Common issues when programming bots with image detection to test security
30309/09/30
Sam V.

When programming bots to automate tasks and test security, the first tool that comes to mind is python. Python has really good libraries to create bots, especially for machine learning and image detection.
Scripting bots can be useful in lots of situations:
- Testing captcha security
- Automating human behavior for repetitive tasks
- Testing bot detection security tools
!!! Please use the knowledge provided here for responsible, ethical testing and improvement of security measures only. !!!
Some captcha are easy to bypass, some companies and websites still use simple catptchas but have some kind of 2fa or other tools to make it harder to bypass it. Have you ever seen captcha on some websites on the deep web? even humans have trouble resolving these (at least I do)
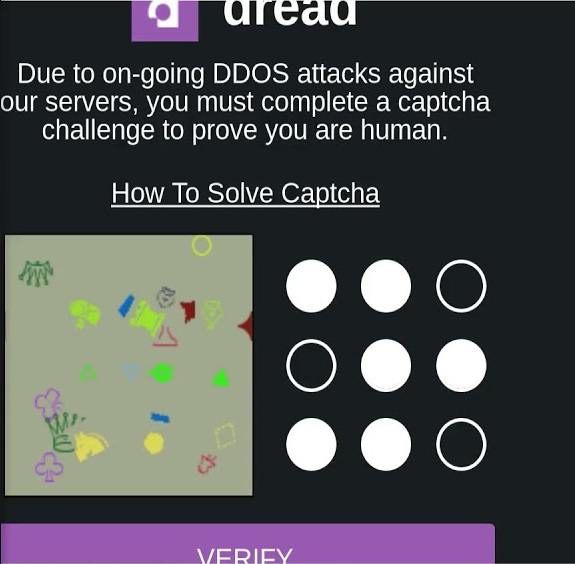
Sometimes you will just have to import the right library, do some OCR (Optical character recognition) and that’s all. But for complex captchas such as these on the deep web you might have to use more advanced techniques such as using masks, maths, machine learning and pixel manipulation techniques.
Here I am going to show you some examples of issues you might encounter for scripting bots to automate account creation and learning purposes, but the tools used can be the same for testing captcha security, automating human actions and so on.
Scripting account creation to test the security of your captchas
The first python library that comes to mind for automating actions on websites is Selenium. The downside of selenium is that if the website owner changes the website layout and IDs you will have to modify your script. Sometimes , the website layout is very complicated and you might loose lot of time scripting and getting the right ids, so it might be better to use other tools on some cases. Pyautogui is also very good for automating stuff on the screen,so we are going to use it here on a specific driver. First we have to create of webdriver, we are using a webdriver to simulate chrome or firefox, here’s how to install it:
You can add more options to make it more stealthy:
import pyautogui
import time
from selenium import webdriver
import random
import names
import string
import secrets
from selenium.webdriver.common.keys import Keys
import pytesseract

options = webdriver.ChromeOptions()
options.add_argument("start-maximized")
# options.add_argument("--headless")
# options.add_experimental_option("excludeSwitches", ["enable-automation"])
# options.add_experimental_option('useAutomationExtension', False)
driver = uc.Chrome(options=options)
# stealth(driver,
#         languages=["en-US", "en"],
#         vendor="Google Inc.",
#         platform="Win32",
#         webgl_vendor="Intel Inc.",
#         renderer="Intel Iris OpenGL Engine",
#         fix_hairline=True,
#         )
Then we can generate random mail adresses and password:
emailwebsite='CHANGEME'
print("how many email accounts do you whish to create?")
choice=int(input())
for i in range (choice):
    # Generate random email name and password
    full_name = names.get_full_name()
    print(full_name)
    if len(full_name) > 1:
        first_letter = full_name[0][0]
        three_letters_surname = full_name[-1][:3].rjust(3, 'x')
        number = '{:03d}'.format(random.randrange (1,999))
        username = '{}{}{}'.format(first_letter, three_letters_surname, number)
        print(username)

    symbols = ['*', '%', '@', '#', "!"] # Can add more
    password = ""
    for _ in range(4):
        password += secrets.choice(string.ascii_lowercase)
        password += secrets.choice(string.ascii_uppercase)
        password += secrets.choice(string.digits)
        password += secrets.choice(symbols)

    print(password)

    driver = webdriver.Firefox()
    driver.get(emailwebsite)
    time.sleep(5)
After that we simply have to tell the script to click on a specific window, to enter text and press enter. To do this we use pyautogui, and we have to take a screenshot, give it a name and it will locate it on screen and click on it if we use pyautogui.click(). You may have big issuee with screen resolution, you have to be carefull with this library and use the same screen resolution for your screenshots and the computer you use to run your script, or it might not work. The confidence parameter is really important , it allows us to specify the percentage of pixels that have to be the same. If I give it a value of 1 for example, all the pixels inside the screenshot have to be exactly the same as what is on my screen. This is important because when you change your screen resolution, you pixel array will also be modified and it will not work even if the picture looks the same for you. If I give it a value of 0.3 , we just need to find an area with a confidence of 30% based on the pixels.Be carefull when you lower this parameter, you will encounter more false positives.
    emailcookies = pyautogui.locateOnScreen("emailcookies.png" ,confidence=0.7)
    pyautogui.moveTo(emailcookies)
    time.sleep(1)
    pyautogui.click()
    time.sleep(3)

    typemail = pyautogui.locateOnScreen("type.png" ,confidence=0.7)
    pyautogui.moveTo(typemail)
    time.sleep(1)
    pyautogui.move(0, 30)
    time.sleep(1)
    pyautogui.click()
    time.sleep(2)
    pyautogui.write(username)
    time.sleep(1)
    pyautogui.press('enter')
    time.sleep(4)
Here we click on “refuse cookies” on the mail website and find an input field and put our newly generated email adress.Notice the use of time.sleep(), in automated testing this something really usefull for avoiding some errors, for example to avoid a locateOnScreen for a picture that has not appeared yet on the screen.
Pyautogui as a default function to give a specific interval of time in seconds between each actions, but sometimes the time needed will vary a lot:
pyautogui.PAUSE = 0.7I noticed some issues in timings with locating and clicking on something. I usually locate something, move to it on the screen first with pyautogui.moveTo(), then wait I 1 or 2 seconds and then click on it.
Using these functions you can navigate to your email creator website, and create it . Once we create and email, we can use it on a website to create a new account, and once you get an acount confirmation code in your newly generated email, you can use OCR to store the content in a variable.
For this I used pytesseract, and I have to say it does not work very well for most pictures unless you use masks and image manipulation techniques, but we will see that in details later.
    coords = pyautogui.screenshot(region=(coordsx,coordsy, 200,40 ))

    text = pytesseract.image_to_string(coords,config="--psm 7 --oem 3")
We first generate a screenshot with the x and y coordinates, width and height.You can get these with prior testing or by getting a locate on screen.Notice that if you put fixed values, with the resolution of your screen or the website changes, it might not work.So for that a locateOnScreen is preferable to get the location of something on the screen, then you can take a screenshot of it using pyautogui.screenshot().
After that the screenshot is stored in memory, you can store it on your disk if you want by giving the path to the pyautogui.screenshot() function. Then we use pytesseract to convert what it sees on the screenshot to a string to get our activation code. the config parameter is the config to run pytesseract, you will have to test some of the different parameter, and it is best to understand how each one of these work:
if like me you like to use multiples tabs for your webdriver, you can switch the focus of tabs by using:
driver.switch_to.window(driver.window_handles[1])After using all these techniques you can create scripts that generate email accounts and automate tasks,sometimes it will be better to just use selenium, the requests ibrary and other times pyautogui. Some email creator websites will also not allow you to generate tons of emails, so you will have to use a captcha.
Personally if I would have to do this again to create multiple bots, I would do it using the requests library with some email creator website that does not need a lot of scripting, 2fa or activation codes. But unfortunately the emails generated from these free email website are not usable for testing bot detection, or are blacklisted by lots of websites. If you can get a classic mail adress from a known company you will avoid issues for your bots in the long run.
There’s another thing to consider, you might have to use different proxies and IP adresses to be able to create your mail adresses for your bots, or else you will be flagged on some websites.
Scripting bots for learning
Once you get some scripts that allow you to automate account creation, you can manage your mail adresses and passwords by using text files or databases if you have a lot of these.
Here I am going to talk a bit about some issues you might encounter when creating bots on a video game for learning purposes:
Usually for scripting bots on a video game, you have 2 options:
- Using proxies and sending packets to the server
- Creating automated bots that click on something on the screen
The first option is the best one in the long run to avoid putting lots of times and effort taking screenshots, but it is more and more easy to identify bots throught network packets and anti-botting techniques. The second option might take some time, but if you put the time and effort you will be able to create bots that act like a human if you want to.
You can script bots to learn on 3d videogames and 2d videogames, obviously it is easier on 2d, but it is still not a big deal to do it with 3d if you know what you are doing. One common issue for example is to get your bot to stay on the same axis without it being obvious or else it will be stuck looking at the sky or the ground in an openworld 3d game.
In 2d you just have to take screenshots, do some programming and that’s it. But you still might encounter some complex issues if your screenshot are not detected by pyautogui or other tools.
def detectandattack(rx,ry,spell):
    line=[]
    l=[]
    distlist=[]
    monsterlist=[]
    found=False
    mfound=-1

    #DETECTING ALL MOB POSITION ON MAP

    for monster in pyautogui.locateAllOnScreen('battle/mob.png',confidence=0.75,region=(565,25,1600,790)):
        if monster is not None:
            monstercenter=pyautogui.center(monster)
        print("monstercenter is:")
        print(monstercenter)
        ############################################
        if  monster is not None:

            mx=monstercenter[0]
            my=monstercenter[1]
            p=[rx,ry]
            q=[mx,my]
            dist=math.dist(p, q)

            distlist.append(dist)
            l.append(dist)
            monsterlist.append(monstercenter)

    if len(monsterlist) != 0 and spell=="arrow":
        #clicking on arrow
        pyautogui.moveTo(1634, 929)
        time.sleep(0.2)
        pyautogui.click()
        min_value = min(l)
        min_index=l.index(min_value)
        dist=distlist[min_index]
        #ATTACKING MOB
        print(monsterlist[min_index])
        closest=monsterlist[min_index]
        time.sleep(0.4)

        midlistx=[]
        midlisty=[]
        for i in monsterlist:

            print(i)
            if i[0] < closest[0]+150 and i[0] > closest[0]-150 and i[1]< closest[1]+150 and i[1]>closest[1]-150:
                midlistx.append(i[0])
                midlisty.append(i[1])
            if i[0] < closest[0]+200 and i[0] > closest[0]-200 and i[1]< closest[1]+100 and i[1]>closest[1]-100:
                midlistx.append(i[0])
                midlisty.append(i[1])
        explox=sum(midlistx) / len(midlistx)
        exploy=sum(midlisty) / len(midlisty)

        matchexplo=pyautogui.pixelMatchesColor(int(explox),int(exploy),(41, 97, 177))
        matchexplo2=pyautogui.pixelMatchesColor(int(explox),int(exploy),(46, 101, 182))
        matchexplo3=pyautogui.pixelMatchesColor(int(explox),int(exploy),(0, 0, 255))
        if matchexplo or matchexplo2 or matchexplo3:
            pyautogui.click(explox,exploy)
            found=True
            print("MATCHEXPLO FOUND")
Here we have a function that will take the player coordinates (rx,ry), locate all the monsters on the screen with pyautogui.locateallOnScreen(),calculate the distance between these to use the best spell to kill the closest monsters or monsters in range. Notice the use of pyautogui.pixelMatchesColor() This function is extremely helpful as it can allow us to check on the screen for a specific RGB value. Let’s say if something is red on your screen at a specific position, you know it is a monster that can be attacked. Then you can use pyautogui to check the pixel at this specific location on the screen, and you will know if you will be able to do something with it depending of the returning value of pyautogui.pixelMatchesColor.
def move(x,y):
    next_x=x
    next_y=y
    pyautogui.moveTo(1324,934)
    time.sleep(0.5)
    pyautogui.moveTo(1324,934)

    # coords = pyautogui.locateOnScreen('pos.png' ,confidence=0.8,region=(1330,897, 55, 25))
    coords = pyautogui.screenshot(region=(1325,897, 62, 25))
    coords = coords.convert("RGB")
    li=[]
    backgroundx=62
    xi=19
    for i in range (42):
        xi+=1
        r, g, b = coords.getpixel((xi, 2))
        li=[r,g,b]

        if np.var(li)>200:

            backgroundx=xi
            break
    coords = pyautogui.screenshot(region=(1325,897, backgroundx, 25))
    # coords = Image.open("pos2.png")
    coords = coords.convert("RGB")
    datas = coords.getdata()
    newData = []
    for item in datas:
        l=[item[0],item[1],item[2]]
        if np.var(l)<=500 and np.mean(l)>120:
            newData.append((255, 255, 255))
        else:
            newData.append(item)
    newData2 =[]
    for item in datas:
        l=[item[0],item[1],item[2]]
        if item[0]<120  and item[1]<120 and item[2]<120:
            newData2.append((0, 0, 0))
        else:
            newData2.append(item)

    coords.putdata(newData2)
    coords=PIL.ImageOps.invert(coords)

    coords.putpixel((9, 14), (255, 255, 255))
    coords.putpixel((9, 15), (255, 255, 255))
    # coords.save("img2.png", "PNG")
    text = pytesseract.image_to_string(coords,config="--psm 7 --oem 3")
    print (text)
    text= text.replace("~", "-" )
    text=''.join(e for e in text if e.isalnum() or e=="," or e=="-")
    text=''.join(e for e in text if e.isdigit() or  e=="-" or e==",")
    print (text)
    text = text.split(",")
    stuck=False
    try:
        actual_x=int(text[0])
        actual_y=int(text[1])
        x=actual_x-next_x
        y=actual_y-next_y
    except:
        print("Could not convert to int")
        stuck=True
One cool thing to do is to make your bot move like a human in your videogame. You can screenshot everything and loose a lot of time, or you can get the exact coordinates on the screen from the map and make your bot moove according to that. It sounds easy just like that. But if you cannot access the network packets or some files,it can be a pain. Here I had a lot of trouble doing this beause of some shapes behind the coordinates on the map. And of course the pixels behind it would change each time, and pytesseract could not read the coordinates with more than 90% accuracy.
So I had to use pixel manipulation techniques and masks. First I took a screenshot of the specific region of the screen, then I converted it to an array of pixels with RGB values. I initialised some variables and tresholds for the background, and used numpy functions to get the variance and mean values, and then I had to replace some pixels that would prevent the OCR to detect the characters. I also had to use PIL.ImageOps.invert() to invert the colors of the screenshot, because the OCR had trouble finding white text with a dark background. So with a modified image with dark text on a white background, It could detect some characters, but I had to replace some of these characters by replacing bad characters in my string. After this I could extract a picture that can be used for pytesseract. Then I had to check if I had numbers for x and y coordinates, and if it was the same value or not for the actual position of the bot on the screen. With knowledge of both the previous coordinate and the next one, I could use pyautogui to make the bot moove in the direction I wanted.
For modifying your pixel arrays you could use opencv2 or pillow, personally I prefer using opencv2 but if you use pillow it might be easier to do it since pyautogui uses pillow and pillow functions.
After knowing how to modify your pixel arrays, to apply tresholds and manipulate your images, you will see that testing and bypassing most captcha and automating human actions becomes very easy. But sometimes it is not enough, and the use of machine learning will be necessary, and it might also not always work with 100% accuracy